Orders with delivery to KANDAHAR only until 6.4.
No products
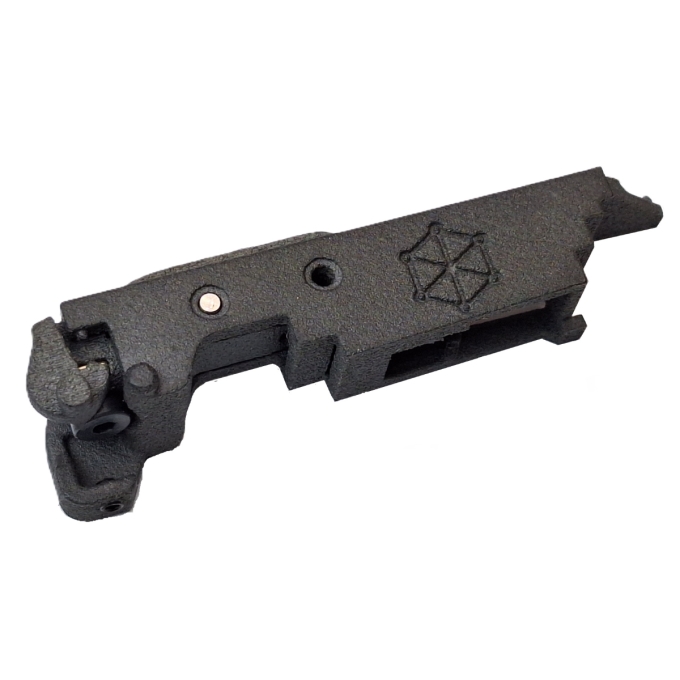
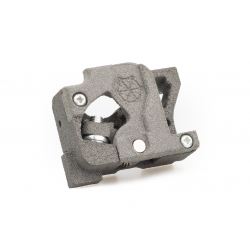
Clicker Magnetic Trigger Resistance for Perun V3 Hybrid
Magnetic Trigger Resistance Clicker by Perun for the V3 gearbox (AK, G36, and others).
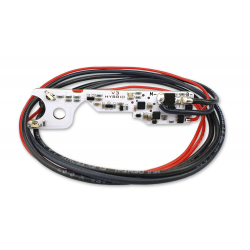
Clicker is an accessory designed for use with Perun V3 Hybrid and ARCTURUS PE processor units.
It introduces a manual magnetic trigger resistance, requiring the magnetic field to be overcome to fire a shot.
This simulates resistance, break, and audible trigger reset.
Další varianty
By buying this product you can collect up to 4 points.
View loyalty points rules.
Accessories
Trigger Magnetic Resistance Clicker from Perun for Hybrid V3 Processor Units
Trigger Magnetic Resistance Clicker is an accessory designed for use with Perun V3 Hybrid processor units. This product provides a real trigger resistance feel similar to that of real firearms, making it ideal for those who want a bit more than just a shot from their airsoft gun.
How does the Clicker work?
Clicker uses a magnet and lever to simulate the so-called wall, which is a method that reduces possible component wear (as happens with spring-based trigger resistance simulations) and provides an unmatched feel of resistance, break, and trigger reset.
When the trigger is pulled, the metal part separates from the magnet with which it is in contact when at rest. Due to the rapid decline of the magnetic field strength with distance, the result is a relatively sharp break in resistance.
The break force is increased by using the lever. When released, a distinct audible reset of the trigger is heard, as the metal part gets very close to the magnet again and immediately attaches to it.
Installation and Adjustment
1. Installation
To install the Clicker, simply remove the V3 Hybrid magnet holder from the trigger and the mechanical safety lock from the gearbox.
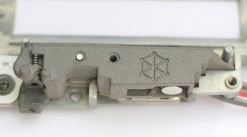
Insert the Clicker into the gearbox.
There may be some resistance during the assembly of the two halves of the gearbox because the Clicker must remain absolutely stationary inside the shell to provide a pleasant trigger pull. Therefore, it was designed to fill the gearbox space as tightly as possible.
2. Break/Resistance Force Adjustment
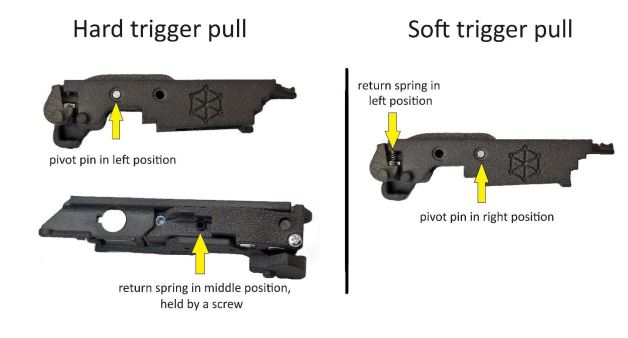
To adjust the trigger resistance force, select one of the two pivot pin holes for the Clicker and change the position of the return spring.
The default setting is for a hard trigger resistance, but you can change it to a soft resistance by moving the pin to the second hole on the Clicker, then remove the screw holding the return spring in the middle position and mount it in the left fitting.
3. Pre-travel
Pre-travel is the low-resistance part of the trigger movement before the wall is encountered. With most trigger and gearbox shell combinations (especially stock ones), there will be a few millimeters of pre-travel that must be overcome before reaching the wall. During pre-travel, the magnet responsible for firing the shot does not move, so only overcoming the wall triggers the shot.
Pre-travel is present in the triggers of many real firearms.
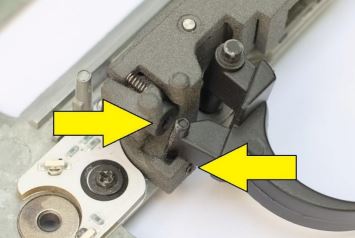
If you want to limit or remove pre-travel, set the trigger to touch the Clicker (but not press on it) when at rest. This can be done using the 2 screws in the photo below.
It is not recommended to add material to the surface that is in direct contact with the Clicker. If the trigger presses on the Clicker when at rest, the break force will be weaker.
The use of the trigger spring with the Clicker is optional, but if there is a lot of pre-travel in the gearbox, the spring is necessary to keep the trigger from hanging loosely.
When the break is set to be softer, the trigger feel will be much nicer.
4. Over-travel
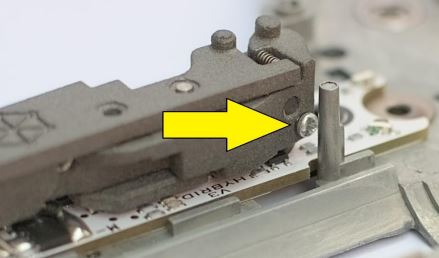
To limit how far the trigger can be pulled after the break, use the screw shown in the picture below. The over-travel screw can be completely removed if the situation requires it.
Excessive limitation of over-travel will cause the trigger not to reset properly, meaning that further shots will not be fired immediately after the trigger reset with an audible click.
If the gun does not fire another shot until the finger is completely off the trigger, increase the amount of over-travel.
5. Trigger Sensitivity Adjustment
After installing the Clicker into the gearbox, the Perun trigger sensitivity should be set to level 4 for both fire selector positions (single, auto). In some cases, it may be necessary to lower the sensitivity to level 3 to avoid shots before the trigger break, or increase to level 5 if very short over-travel is set.
6. Final Check after Clicker Installation
We recommend taking advantage of the V3 gearbox, meaning the ability to test the gearbox without installing it into the gun body.
Clicker settings may sometimes require fine-tuning to work exactly as expected, including experimenting with various pre-travel, over-travel, and trigger sensitivity settings for the Perun V3 control unit.
A lot of time can be saved by ensuring that everything works in a so-called dry run without the piston, pneumatic system, and spring (just the Clicker, trigger, gears, motor). This is also the best and quickest way to experiment with different settings.
The switch check mode of the Perun unit may not be sufficient to ensure the proper trigger response because the switch check does not provide precise information about the trigger reset.
When conducting these tests, if access to programming mode is needed, simply place the selector plate on the gearbox and manually move it in front of the Perun unit sensors as needed to simulate the SAFE, AUTO, and SEMI positions.
Tips and Recommendations for Clicker V3 Users
A. Recommendations for a More Realistic Trigger Feel in AK-Type Guns
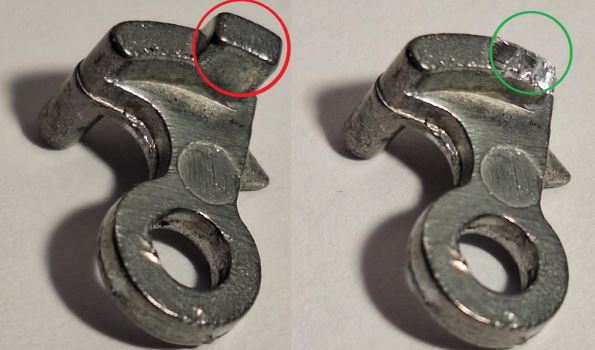
In some AK replicas, it can be challenging to accurately replicate the feel of the real AK trigger with long pre-travel because the trigger movement range may not be sufficient.
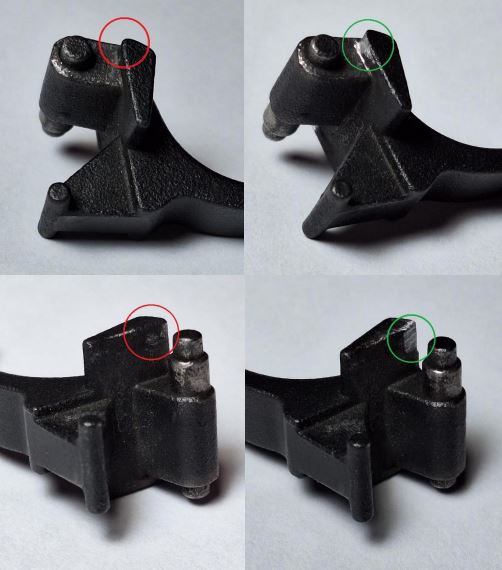
In such cases, the technician installing the trigger should identify the parts of the trigger that obstruct the movement and sand them down.
Below is an example with a pair of photos before sanding (in red) and after sanding (in green).
These small adjustments allowed the trigger to move sufficiently forward to simulate the feel of a real AK.
B. Adding Magnets to Plastic Bodies with V3 Gearbox (MP5k, G36, etc.)
In replicas with plastic bodies (G36 or some MP5k), the trigger stiffness can be increased using 6 x 1 mm disc magnets attached to the metal part. The Clicker V3 comes with 3 such magnets. The magnets hold on their own and are not prone to falling out due to vibrations, but if the technician wishes, they can be additionally glued.
To soften the trigger pull, one, two, or all of the magnets can be removed from the metal part. The configuration on the left provides the stiffest pull, while the configuration on the right is the softest.
Note: Using these magnets with steel AK bodies will cause the Clicker to lock! This can be circumvented by attaching a piece of non-ferromagnetic material to the top magnet so it does not stick to the body. This solution will also limit the trigger's over-travel.
C. Trigger Lock Adjustment in G36
In G36 replicas and some others with a similar lock mechanism, it is necessary to modify the part of the trigger lock as shown below. The protruding part can be sanded or even clipped off with good pliers.
Compatibility
With triggers:
Tokyo Marui V3 standard, Arcturus (TM-compatible versions, like the PE models), CYMA, E&L, G&G, JG, LCT.
In some G36 replicas, it is necessary to partially sand the trigger for the Clicker to work properly.
With gearboxes:
Tokyo Marui V3 standard, Arcturus (TM-compatible versions, like the PE models), CYMA, E&L, G&G, JG, LCT.
When installing in APS or Bolt guns, the Clicker may need to be modified to fit the gearbox.
Package Contents
- Clicker V3 unit
English Manual
The original English manual can be downloaded here: https://www.perunairsoft.pl/clickerv3.pdf.
| Color | Black |

